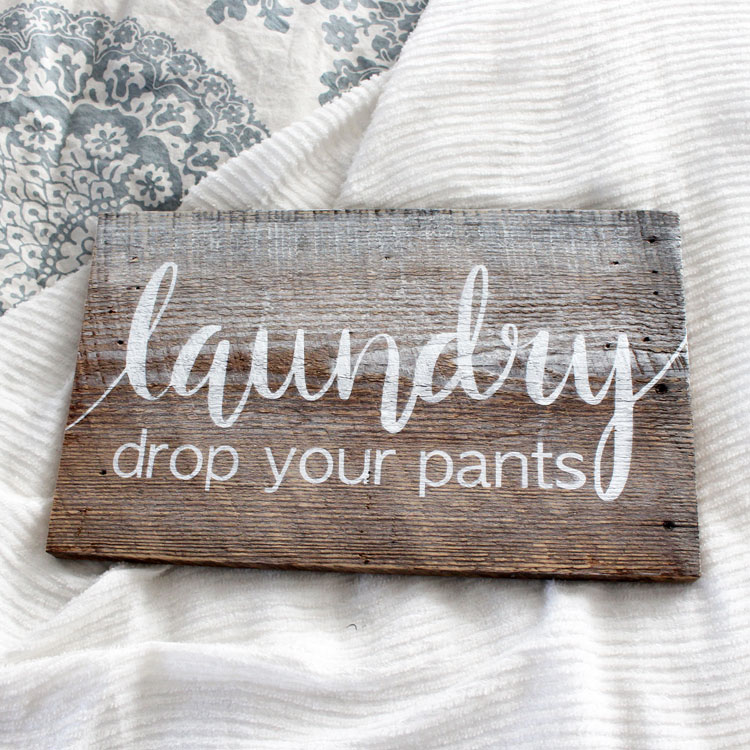
Handmade Happiness: A Step-by-Step Guide to a DIY Mother’s Day Wood Sign
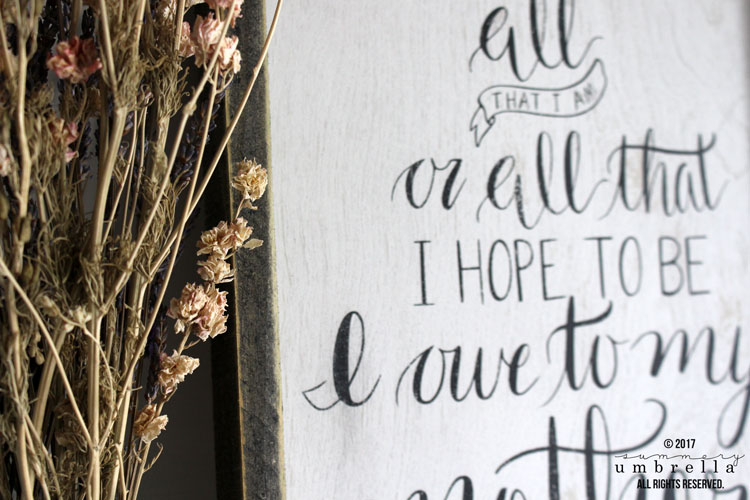
Ever since we were little the best gifts have always been homemade gifts. Show your mother how thoughtful you are with this easy DIY Mother’s Day Wood Sign!

Hello, hello, hello! How was your week? Crazy?
Yea, mine too! But, I have to admit. I’m one of those crazies that does my best work when I’m staying busy.
Plus, I work better under pressure, and let’s be honest, I do love my job!
Want this freebie? Sign up for access to my resource library below.
I couldn’t be happier with what I do every day even if drives me a little cuckoo for cocoa puffs sometimes.
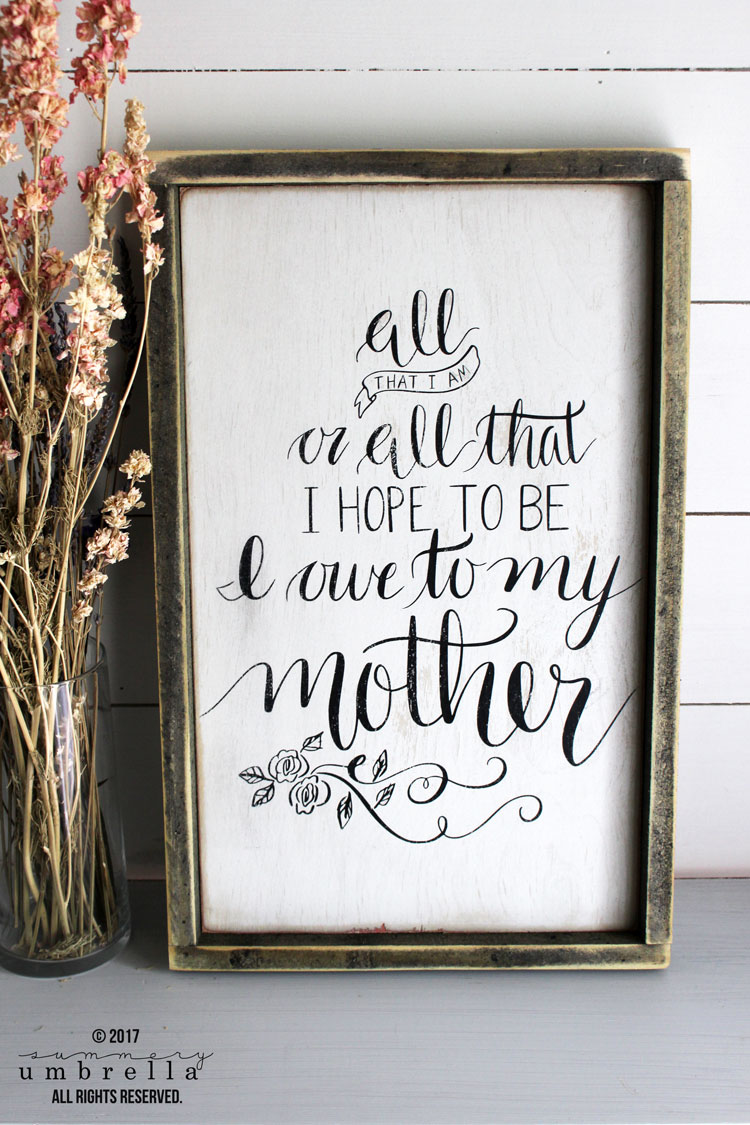
Come on, I get to be an artist (my dream since I was 12 years old) and draw and paint every day. With that being said, it’s why I was able to create this beautiful DIY Mother’s Day Wood Sign and can now show you how to make your own!
Easy and Thoughtful Mother’s Day Gift Idea
Supplies
- 1 – sign (to repurpose OR a pre-painted 1/2″ cabinet grade plywood (16”x10”)
- Silhouette CAMEO (or favorite cutting machine) and Mat
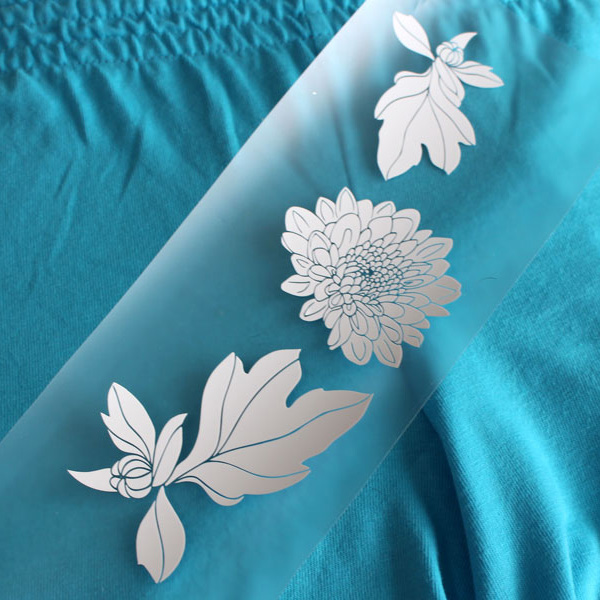
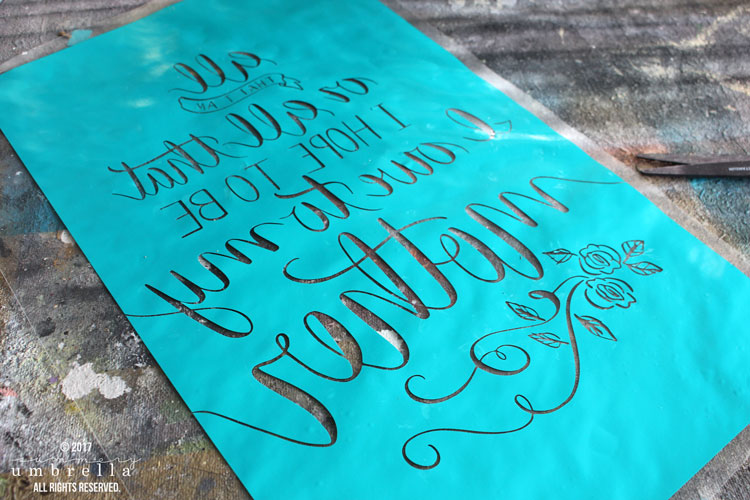
- All That I Am Mother Quote SVG Cut File (project template)
- Vinyl
- Transfer Tape
- Squeegee (or even a credit card)
- Spray Paint (or Airbrush and Lacquer Paint)
- Wood for Framing
Instructions
- First things first, go ahead and download the template file by signing up above to my resource library, and cut it out using your Silhouette CAMEO. Not sure how to do that? No problem! This tutorial will walk you through the steps to help you get it figured out fast.
- Using your Silhouette CAMEO cut out the project templates from above with the vinyl on your mat.
- Remove the vinyl from your mat, and apply your transfer tape.
- Take off the backing from your vinyl, and carefully remove the vinyl pieces of your design that you will be painting.
- The key to using any stencil is all about the application. It’s extremely important that you do not apply too much paint, or it will go underneath your stencil creating a less-than-perfect design. Remember, always use several, light layers.
- Once you have removed all of your vinyl pieces it is now time to apply them to your prepped sign board. Line up your vinyl with your board so it will be applied evenly, and using your squeegee firmly push it down.
- Slowly remove your transfer tape so that only your vinyl is left on your board.
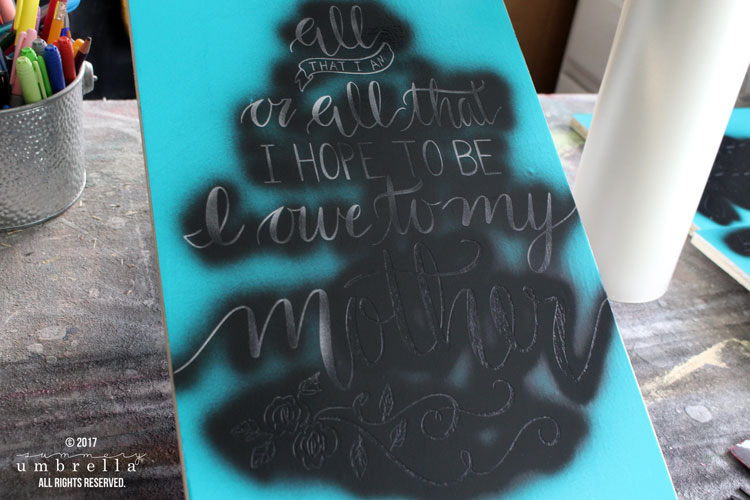
- In a ventilated area, evenly apply a light coat of spray paint (or lacquer paint and your airbrush) to your vinyl. Allow it to dry and then apply your next layer. Repeat this step until your desired color has been achieved.
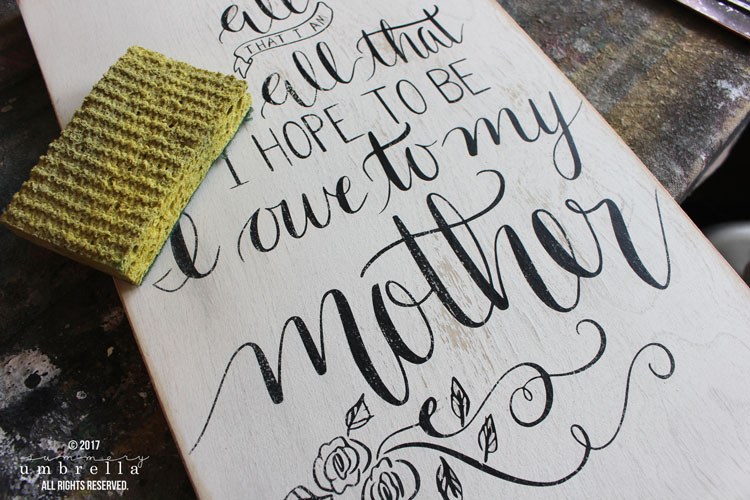
- Once your paint has completely dried remove your vinyl. TIP: If you’re having a hard time pulling up small pieces of the vinyl Silhouette does offer a handy tool kit for removing vinyl.
The Best DIY Mother’s Day Wood Sign
- Now for this next step, I wanted to distress the front of my sign a little bit, and unfortunately just using my sander wasn’t completely doing the trick. After I sanded down the front of my sign using 220-grit sandpaper I also sprayed it down with a general cleaner and scrubbed it with a sponge. Thankfully that was exactly what I needed to do the trick! Some of the paint came off, and it gave it that gorgeous rustic and distressed look I was going for.
- Since I did a lot of distressing to the front of the sign next I sprayed it down with a layer of matte finishing spray for added protection.
- Then, frame this baby up! Unsure how to do that? Check out this tutorial for assistance.
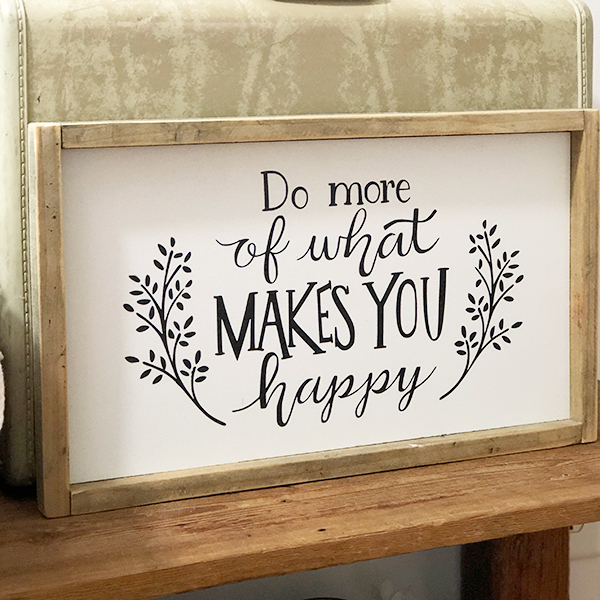
Looking for more DIY sign inspiration?
- Tips and Tricks for Making Reclaimed Wood Signs
- DIY Love You Wood Sign
- DIY Spring Flowers Wood Sign Plus Video

Wasn’t that easy? I just love a good ol’ rustic and distressed sign, and even better… a DIY Mother’s Day Wood Sign that I just know my mom and YOURS will love for many more years to come! See you next time.
Pssttt…. Don’t forget to check out my DIY Signs projects page chocked full of DIY and decorating goodness!

If you haven’t already, don’t forget to download the SVG file for this project before you go!
More of What You Love: Check Out These Recommended Posts!
Let’s be Social
This post was updated in February 2023.